


 5.2.6 Migrating the
Contents of Physical Volume


 5.2.6 Migrating the
Contents of Physical Volume
This section discusses the functions that can be performed on volume groups. As with physical volumes, volume groups can be created and removed, and their characteristics can be modified. Additional functions such as activating and deactivating volume groups can also be performed.
Before a new volume group can be added to the system, one or more physical volumes, not used in other volume groups, and in an available state, must exist on the system.
It is important to decide upon certain information such as the volume group name and the physical volumes to use prior to adding a volume group.
New volume groups can be added to the system by using the mkvg command or by using SMIT. Of all the characteristics set at creation time of the volume group, the following are essentially the most important:
The following example shows the use of the mkvg command to create a volume group, myvg, using the physical volumes hdisk1 and hdisk5, with a physical partition size of 8 KB. The volume group is limited to a maximum of 10 physical volumes.
mkvg -y myvg -d 10 -s 8 hdisk1 hdisk5
Alternatively, you can use the SMIT fast path command,
smitty mkvg to obtain the screen shown in
Figure 36 and enter the characteristics of the volume
group to be created in the fields.
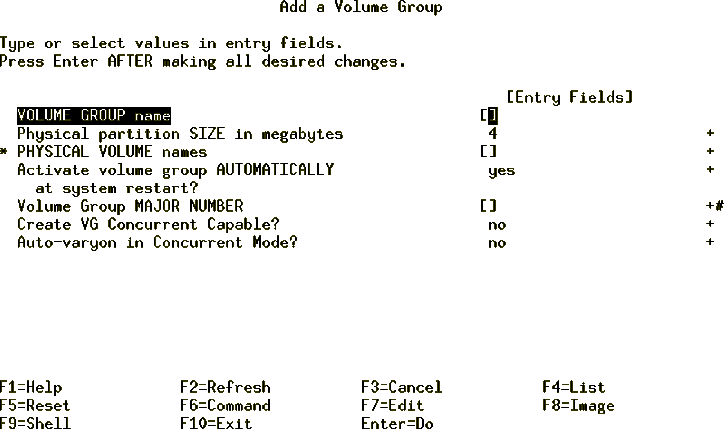
Figure 36: smitty mkvg Command
The smitty mkvg command will automatically activate the volume group by calling the varyonvg command. Moreover, the SMIT command limits the followings function as compared to command line.
| Note |
|---|
|
For a new volume group to be successfully added to the system using the mkvg command, the root file system should have about 2 MB of free space. Check this using the df command. This free space is required because a file is written in the directory /etc/vg each time a new volume group is added. |
The following sections discuss the tasks required to modify a volume group's characteristics.
It may be necessary to increase the free space available in a volume group so that existing file systems and logical volumes within the volume group can be extended, or new ones can be added. To do this requires additional physical volumes be made available within the volume group.
It is possible to add physical volumes to a volume group, up to the maximum specified at creation time. A physical volume can be added using the extendvg command. The following example shows the command to add the physical volume, hdisk3, to volume group newvg.
extendvg newvg hdisk3
| Note |
|---|
|
The extendvg command will fail if the physical volume being added already belongs to a varied on volume group on the current system. Also, if the physical volume being added belongs to a volume group that is currently not varied on, the user will be asked to confirm whether or not to continue. |
Alternatively, you can use the SMIT fast path command smitty vgsc and select the option Add a Physical Volume to a Volume Group.
The volume group must be varied on before it can be reduced. The following example shows how to remove a physical volume, hdisk3, from a volume group, myvg.
reducevg myvg hdisk3
Alternatively, you can use the SMIT fast path command smitty reducevg to remove a physical volume from a volume group.
| Note |
|---|
|
The reducevg command provides the -d and -f flags.
|
If the logical volumes on the physical volume specified to be removed also span other physical volumes in the volume group, the removal operation may destroy the integrity of those logical volumes, regardless of the physical volume on which they reside.
When you remove all physical volumes in a volume group, the volume group itself is also removed.
Sometimes a disk is removed from the system without first running reducevg VolumeGroup PhysicalVolume. The VGDA still has the removed disk's reference, but the physical volume name no longer exists or has been reassigned. To remove references to the disk which has been removed, you can still use the reducevg command using the PVID of the physical volume removed. The following command will remove the reference of a physical volume (with PVID of 000005265ac63976) from the volume group newvg.
reducevg VolumeGroup PVID
There may be times when a volume group needs to be moved from one RISC System/6000 system to another, so that logical volume and file system data in the volume group can be accessed directly on the target system.
To remove the system definition of a volume group from the ODM database, the volume group needs to be exported using the exportvg command. This command will not remove any user data in the volume group, but will only remove its definition from the ODM database.
Similarly, when a volume group is moved, the target system needs to add the definition of the new volume group. This can be achieved by importing the volume group using the importvg command, which will add an entry to the ODM database.
The following example shows the export of a volume group myvg.
exportvg myvg
And the following example shows the import of a volume group myvg.
importvg myvg
You can also use SMIT fast path commands, smitty exportvg or smitty importvg, to export or import a volume group.
If the specified volume group name is already in use, the importvg command will fail with an appropriate error message, since duplicate volume group names are not allowed. In this instance, the command can be rerun with a unique volume group name specified, or it can be rerun without the -y flag or the volume group name, which gives the imported volume group a unique system default name. It is also possible that some logical volume names may also conflict with those already on the system. The importvg command will automatically reassign these with system default names. The important thing to remember when moving volume groups from system to system, is that the exportvg command is always run on the source system prior to importing the volume group to the target system. Consider that a volume group is imported on system Y without actually performing an exportvg on system X. If system Y makes a change to the volume group, such as removing a physical volume from the volume group, and the volume group is imported back onto system X, the ODM database on system X will not be consistent with the changed information for this volume group.
It is, however, worth noting that a volume group can be moved to another system without first being exported on the source system.
| Note |
|---|
|
Once a volume group exists, it can be made available for use for system administrative activities using the varyonvg command. This process involves the following steps.
The varyonvg command has the following options that can be used to overcome damage to the volume group structure or give status information.
The following example shows the command to activate a volume group, newvg.
varyonvg newvg
You can also use SMIT fast path command, smitty varyonvg, to obtain
the screen shown in Figure 37 and enter the name of volume
group to be varied on along with all the options.
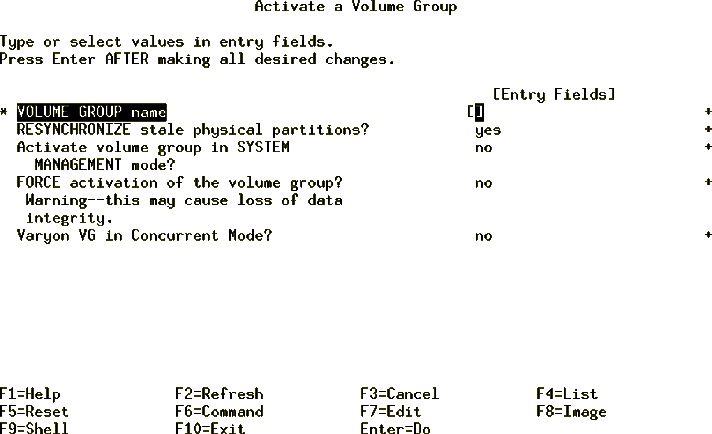
Figure 37: smitty varyonvg Command
The varyoffvg command will deactivate a volume group and its associated logical volumes. This requires that the logical volumes be closed which requires that file systems associated with logical volumes be unmounted. The varyoffvg also allows the use of the -s flag to move the volume group from being active to being in maintenance or systems management mode.
| Note |
|---|
|
In AIX Version 4, when a volume group is imported it is automatically varied on, whereas, in AIX Version 3, the volume group has to be varied on separately. |
The following example shows the command to deactivate a volume group, myvg.
varyoffvg myvg
You can also use SMIT fast path command, smitty varyoffvg, which
will show a screen as in Figure 38. You can enter the name
of volume group to be varied off and you can also put the volume group in
system management mode.
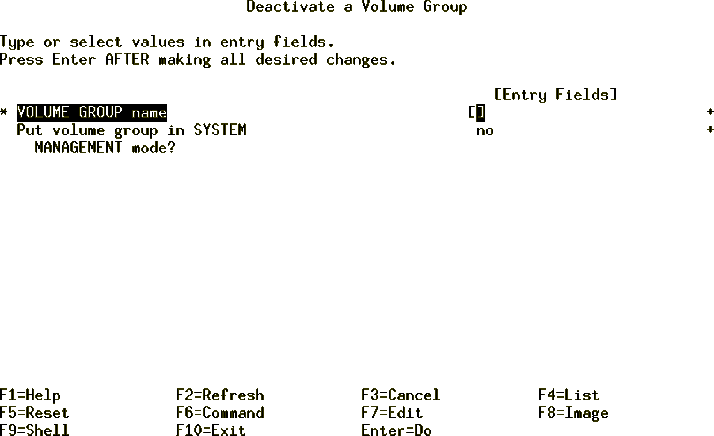
Figure 38: smitty varyoffvg Command
The lsvg command interrogates the ODM database for all volume groups currently known to the system. The following are a few examples showing the use of the lsvg command to monitor volume groups.
The following example shows the use of the lsvg command without any flag to list all the volume groups known to the system.
# lsvg
rootvg
altinst_rootvg
datavg
testvg
#
The following example shows how to list the volume groups which are currently active (varied on).
# lsvg -o
testvg
datavg
rootvg
The example in Figure 39 shows the command to list
detailed information and status about volume group characteristics.

Figure 39: lsvg rootvg Command
The example in Figure 40 shows the command used to
display the names, characteristics, and status of all the logical volumes in
volume group rootvg.
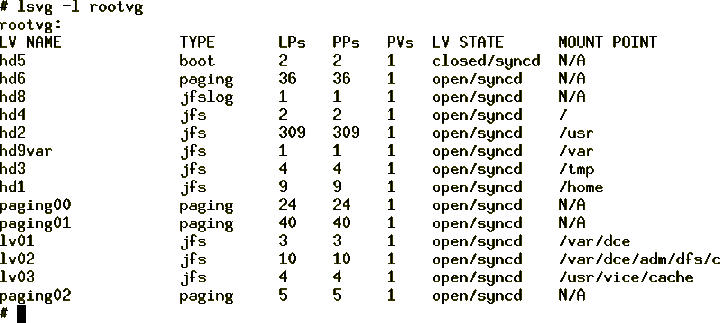
Figure 40: lsvg -l rootvg Command
The example shown in Figure 41 shows the use of the
lsvg command with the -p flag to display a list of physical volumes
contained in a volume group, as well as some status information including
physical partition allocation. This form of the lsvg command is useful
for summarizing the concentrations of free space on the system.

Figure 41: lsvg -p vgname Command
Following is the description of the various fields shown in the preceding example.
The reorgvg command is used to reorganizes the physical partition allocation for a volume group according to the allocation characteristics of each logical volume.
Following is the syntax of the reorgvg command.
reorgvg [ -i ] VolumeGroup [ LogicalVolume ... ]
The volume group must be varied on and must have free partitions before you can use the reorgvg command. The relocatable flag of each logical volume must be set to y using the chlv -r command for the reorganization to take effect; otherwise, the logical volume is ignored.
| Note |
|---|
|
In AIX Version 4.2 or later, if you enter the reorgvg command with the volume group name and no other arguments, the entire volume group is reorganized.
You can also use the SMIT fast path command, smitty reorgvg to do
the same task. See Table 5 for details on the flags for
the reorgvg command.

Table 5: reorgvg Command Flags
reorgvg vg02 lv03 lv04 lv07
Only the listed logical volumes are reorganized on vg02.
echo "hdisk04 hdisk06" | reorgvg -i vg02 lv203 lv205
Only the partitions located on physical volumes hdisk04 and hdisk06 of volume group vg02, which belong to logical volumes lv203 and lv205, are reorganized.
The syncvg command is used to synchronize logical volume copies that are not current (stale).
Following is the syntax of syncvg command.
syncvg [ -f ] [ -i ] [ -H ] [ -P NumParallelLps ] { -l | -p | -v }
Name ...
The syncvg command synchronizes the physical partitions, which are copies of the original physical partition that are not current. The syncvg command can be used with logical volumes, physical volumes, or volume groups, with the Name parameter representing the logical volume name, physical volume name, or volume group name. The synchronization process can be time consuming, depending on the hardware characteristics and the amount of data.
When the -f flag is used, an uncorrupted physical copy is chosen and propagated to all other copies of the logical partition, whether or not they are stale.
Unless disabled, the copies within a volume group are synchronized
automatically when the volume group is activated by the varyonvg
command. The commonly used flags with the syncvg command are shown in
Table 6.

Table 6: Key Flags for the syncvg Command
The following examples show the use of the syncvg command.
syncvg -p hdisk04 hdisk05
syncvg -v vg04 vg05
This section describes how to move a volume group from one disk onto another disk. A problem faced will be that the new disk already has a volume group.
To migrate the information from the physical volume hdisk4 to the physical volume hdisk3 enter:
# migratepv hdisk4 hdisk3
0516-806 migratepv: Destination physical volume hdisk3 belongs
        to wrong volume group.
# lspv
hdisk0         000919746edab91f    rootvg
hdisk1         0009197459d92f2e    None
hdisk2         00091974d381d097    uservg
hdisk3         00091974d81ff431    newvg
hdisk4         00091974de731316    uservg
The easiest option is to move hdisk4 to hdisk1. The command for this is:
migratepv hdisk4 hdisk1
The other option is to delete the volume group newvg. Any file systems associated with newvg and any logical volumes associated with newvg must be removed.
List the file system information and look for the newlv logical volume. Notice it is mounted on /u1.
# lsfs
Name            Nodename   Mount Pt               VFS   Size    Options    Auto Accounting
/dev/hd4        --         /                      jfs   32768   --         yes  no
/dev/hd1        --         /home                  jfs   3276800 --         yes  no
/dev/hd2        --         /usr                   jfs   4702208 --         yes  no
/dev/hd9var     --         /var                   jfs   16384   --         yes  no
/dev/hd3        --         /tmp                   jfs   32768   --         yes  no
/dev/userlv     --         /u                     jfs   3276800 rw         yes  no
/dev/newlv      --         /u1                    jfs   3276800 rw         yes  no
List the volume group to find the logical volume information. Notice the newlv and loglv01 LV names.
# lsvg -o | lsvg -l newvg
newvg:
LV NAME       TYPE   LPs   PPs   PVs  LV STATE    MOUNT POINT
newlv         jfs    200   200   1    open/syncd  /u1
loglv01       jfslog 1     1     1    open/syncd  N/A
List the mount information to check if newlv is mounted. Notice that /u is mounted.
# mount
  node       mounted        mounted over    vfs       date        options
-------- ---------------  ---------------  ------ ------------ ---------------
         /dev/hd4         /                jfs    Nov 16 18:45 rw,log=/dev/hd8
         /dev/hd2         /usr             jfs    Nov 16 18:45 rw,log=/dev/hd8
         /dev/hd9var      /var             jfs    Nov 16 18:45 rw,log=/dev/hd8
         /dev/hd3         /tmp             jfs    Nov 16 18:45 rw,log=/dev/hd8
         /dev/hd1         /home            jfs    Nov 16 18:46 rw,log=/dev/hd8
         /dev/userlv      /u               jfs    Nov 17 14:12 rw,log=/dev/loglv00
         /dev/newlv       /u1              jfs    Nov 17 14:13 rw,log=/dev/loglv01
To unmount the /dev/newlv logical volume enter:
umount /dev/newlv
Type mount to check if /dev/newlv has ben unmounted. If successful type:
smitty lvm
At the Logical Volume Manager menu select Logical
Volumes, as displayed in Figure 42.
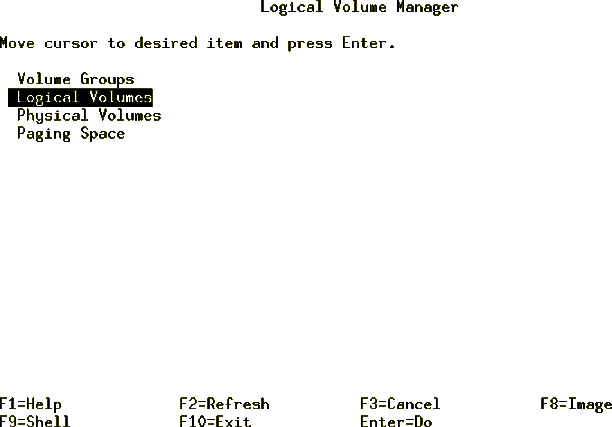
Figure 42: Logical Volume Manager Menu
From the Logical Volumes Menu select Remove a Logical Volume as
displayed in Figure 43.
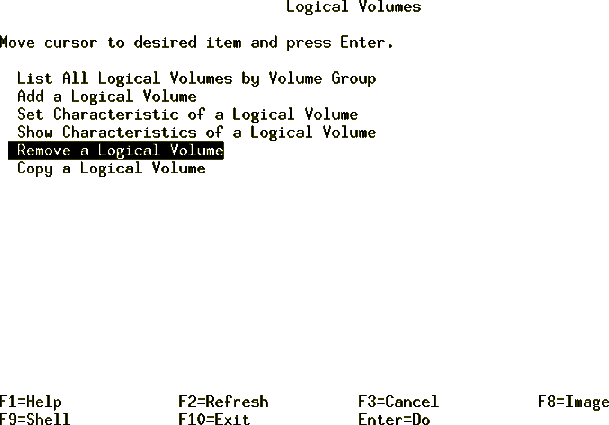
Figure 43: Logical Volumes Menu
From the Remove a Logical Volume menu, enter the Logical volume name you
want removed, as displayed in Figure 44.
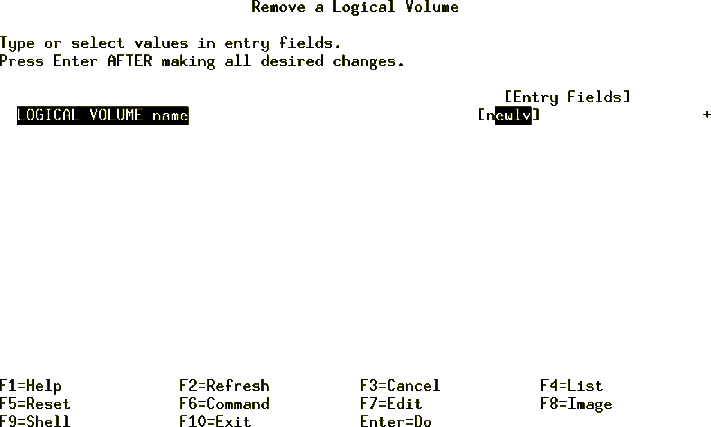
Figure 44: Remove a Logical Volume Menu
In Figure 45 is the confirmation screen to continue.
Press Enter to continue.
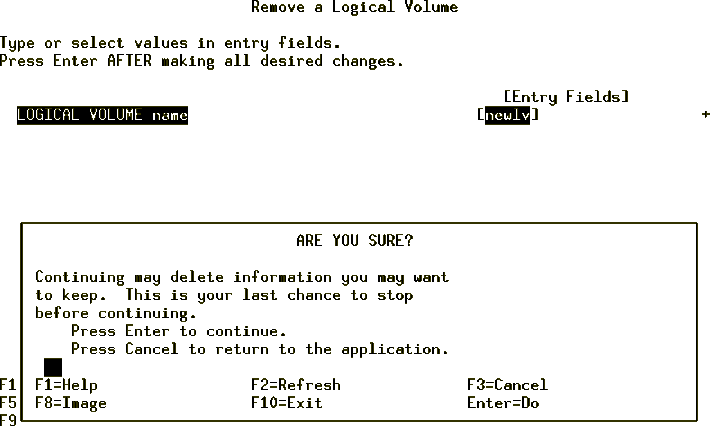
Figure 45: Remove a Logical Volume - Confirmation Screen
Once completed, the system will display the command status as in
Figure 46.
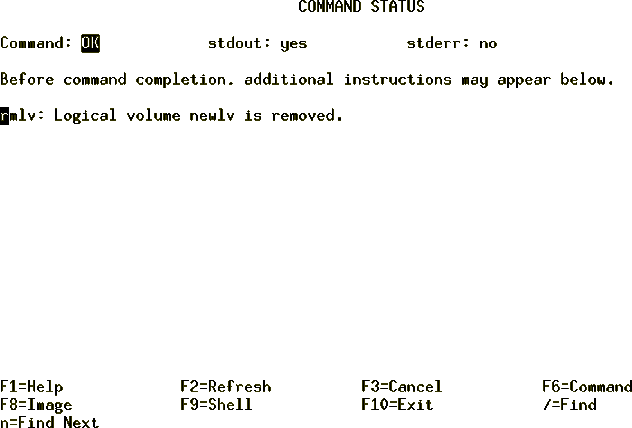
Figure 46: Command Status Window - Remove a Logical Volume
Once the Logical Volume has been removed, the Volume Group must be removed.
Press F3 until you get to the Logical Volume Manager menu, then select
Volume Groups as displayed in Figure 47.
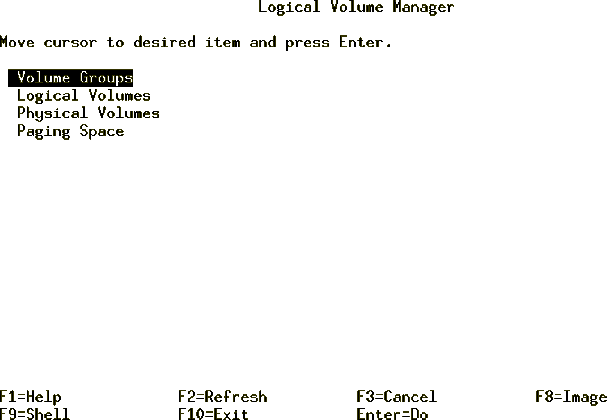
Figure 47: Logical Volume Manager Menu
In the Volume Groups menu select Remove a Volume Group as displayed
in Figure 48.
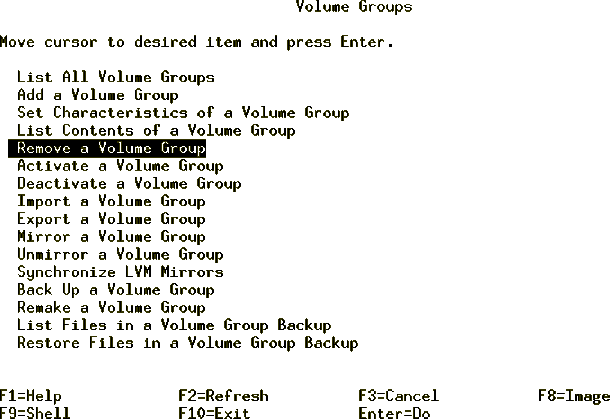
Figure 48: Volume Groups Menu
From the Remove a Volume Group menu, select the VOLUME GROUP name to be
removed as displayed in Figure 49.
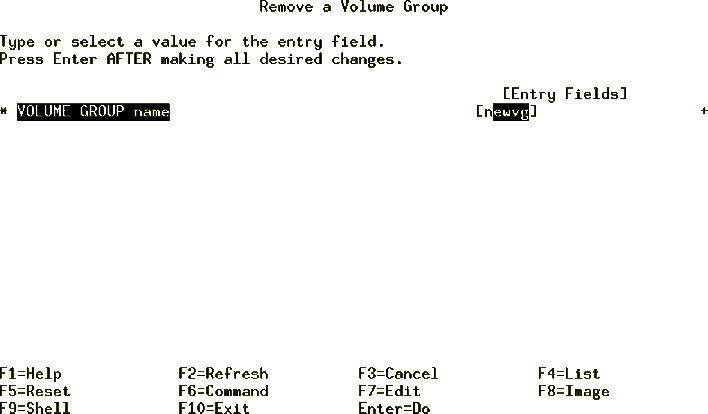
Figure 49: Remove a Volume Group Menu
After a selection has been entered for the Volume Group to remove, a
confirmation screen is displayed as in Figure 50. Press
Enter to continue.
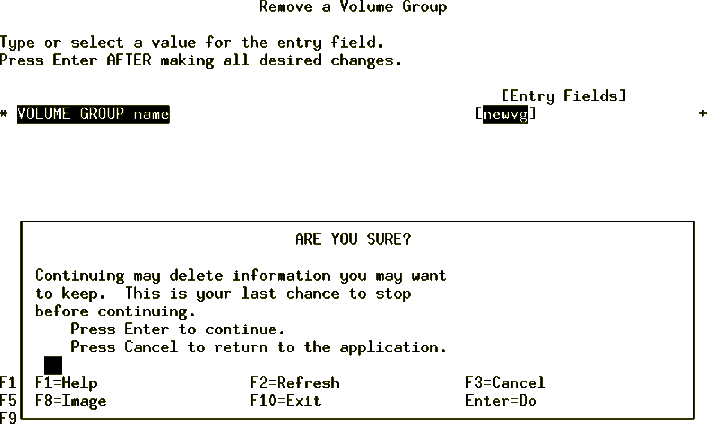
Figure 50: Remove a Volume Group Confirmation Window
Figure 51 is the COMMAND STATUS screen confirming a
successful removal of the Volume Group.
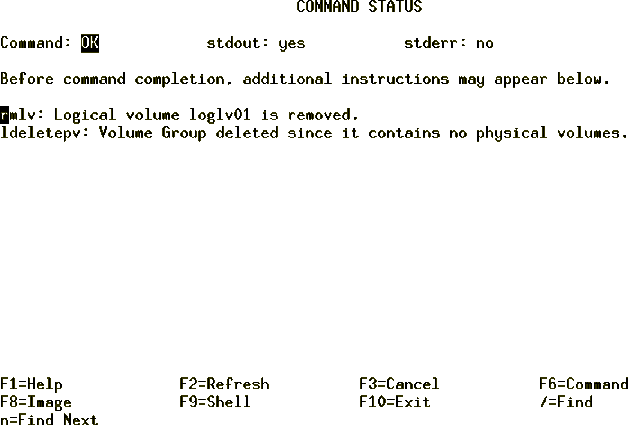
Figure 51: Command Status Screen for Removal of a Volume
Group
Press F10 to exit to the command prompt.
To check the status of your Physical Volumes enter:
# lspv
hdisk0         000919746edab91f    rootvg
hdisk1         0009197459d92f2e    None
hdisk2         00091974d381d097    uservg
hdisk3         00091974d81ff431    None
hdisk4         00091974de731316    uservg
hdisk5         00091974e4f3d56e    None
To add the physical volume hdisk3 to the volume group uservg enter:
smitty vg
From the Volume Groups menu select the Set
Characteristics of a Volume Group option as displayed in
Figure 52.
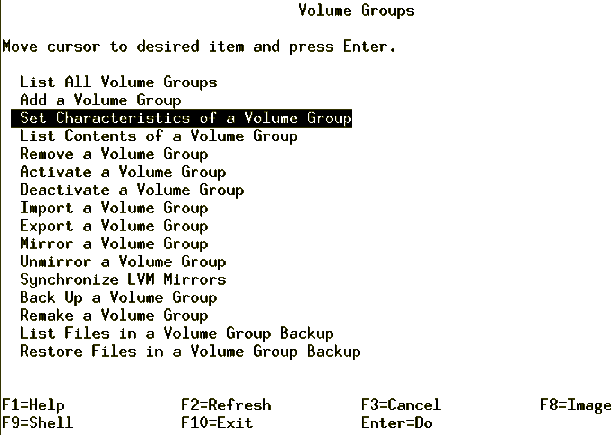
Figure 52: Volume Groups Menu
From the Set Characteristics of a Volume Group menu, select the Add a
Physical Volume to a Volume Group option as displayed in
Figure 53.
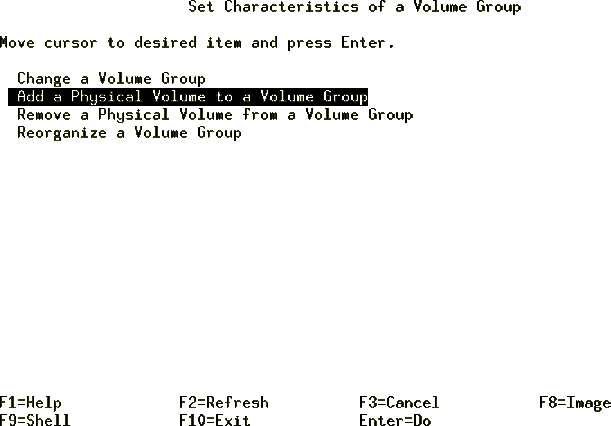
Figure 53: Set Characteristics of a Volume Group Menu
In the Add a Physical Volume to a Volume Group field, enter the VOLUME
GROUP name and the PHYSICAL VOLUME names as displayed in
Figure 54.
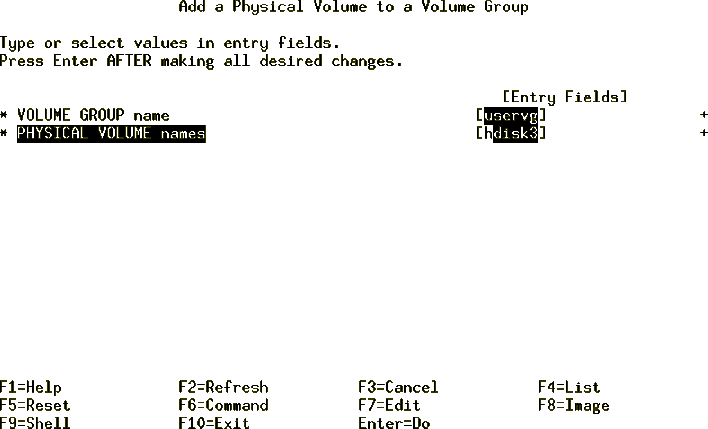
Figure 54: Add a Physical Volume to a Volume Group Menu
Figure 55 displays the confirmation screen in the Add a
Physical Volume to a Volume Group menu. Press Enter to continue.
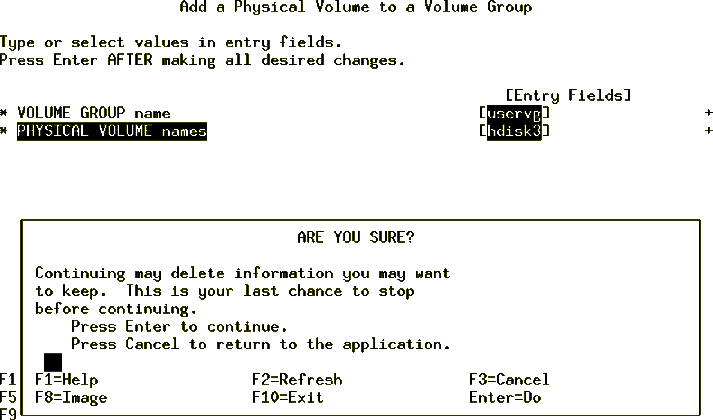
Figure 55: Add a Physical Volume to a Volume Group Confirmation
Screen
Once the command has completed, you will see Command: OK as displayed in
Figure 56.
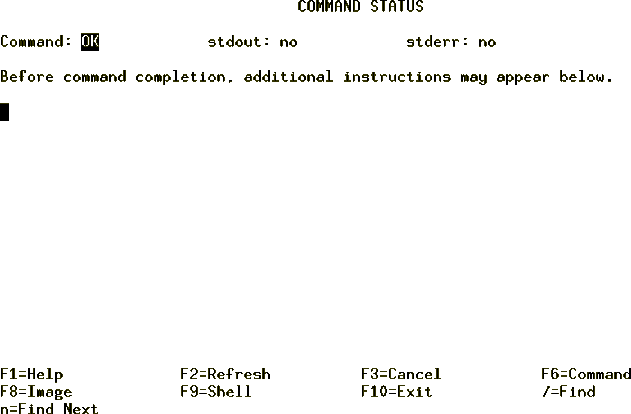
Figure 56: Add a Physical Volume to a Volume Group Command Status
Screen
Press F10 to exit to the command prompt. At the command prompt, check the status of your Physical Volume. Enter:
# lspv
hdisk0         000919746edab91f    rootvg
hdisk1         0009197459d92f2e    None
hdisk2         00091974d381d097    uservg
hdisk3         00091974d81ff431    uservg
hdisk4         00091974de731316    uservg
hdisk5         00091974e4f3d56e    None
To move the information from hdisk4 to hdisk3 enter:
migratepv hdisk4 hdisk3
To remove hdisk4 from the volume group uservg enter:
# reducevg uservg hdisk4
# lspv
hdisk0         000919746edab91f    rootvg
hdisk1         0009197459d92f2e    None
hdisk2         00091974d381d097    uservg
hdisk3         00091974d81ff431    uservg
hdisk4         00091974de731316    None
hdisk5         00091974e4f3d56e    None
In this section, there exists a volume group called uservg on hdisk2. You are going to install a new disk and try to extend a uservg to use that drive.
List the volume groups to check what is available:
# lsvg
rootvg
uservg
newvg
List the disk devices on your system by entering:
# lsdev -Cc disk
hdisk0 Available 40-58-00-0,0 16 Bit SCSI Disk Drive
hdisk1 Available 40-58-00-1,0 16 Bit SCSI Disk Drive
hdisk2 Available 20-68-L      SSA Logical Disk Drive
hdisk3 Available 20-68-L      SSA Logical Disk Drive
Shut the system down and install the new device, boot the machine, log into root and then enter the following:
# lsdev -Cc disk
hdisk0 Available 40-58-00-0,0 16 Bit SCSI Disk Drive
hdisk1 Available 40-58-00-1,0 16 Bit SCSI Disk Drive
hdisk2 Available 20-68-L      SSA Logical Disk Drive
hdisk3 Available 20-68-L      SSA Logical Disk Drive
hdisk4 Defined   20-68-L      SSA Logical Disk Drive
To check the volume group uservg, enter:
# lsvg uservg
VOLUME GROUP:   uservg          VG IDENTIFIER:  000919742f85e776
VG STATE:       active          PP SIZE:        8 megabyte(s)
VG PERMISSION:    read/write        TOTAL PPs:      537 (4296 megabytes)
MAX LVs:          256               FREE PPs:       336 (2688 megabytes)
LVs:              2                 USED PPs:       201 (1608 megabytes)
OPEN LVs:       2               QUORUM:         2
TOTAL PVs:      1               VG DESCRIPTORS: 2
STALE PVs:      0               STALE PPs:      0
ACTIVE PVs:     1               AUTO ON:        yes
MAX PPs per PV: 1016            MAX PVs:        32
To extend the volume group uservg, enter the following:
smitty vg
Select the Set Characteristics of a Volume Group
option from the Volume Groups menu as displayed in
Figure 57.
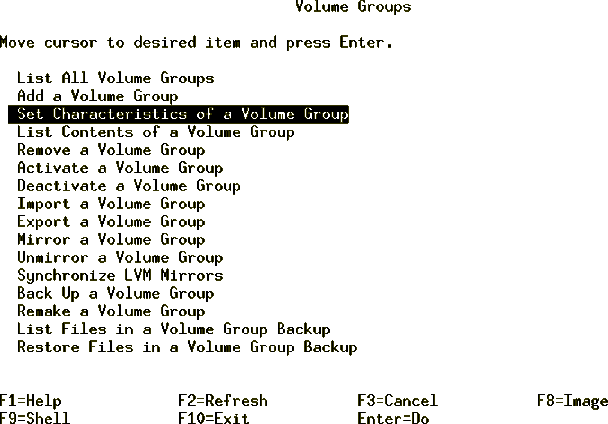
Figure 57: The Volume Groups Menu
Select the Add a Physical Volume to a Volume Group option in the Set
Characteristics of a volume group menu as displayed in
Figure 58.
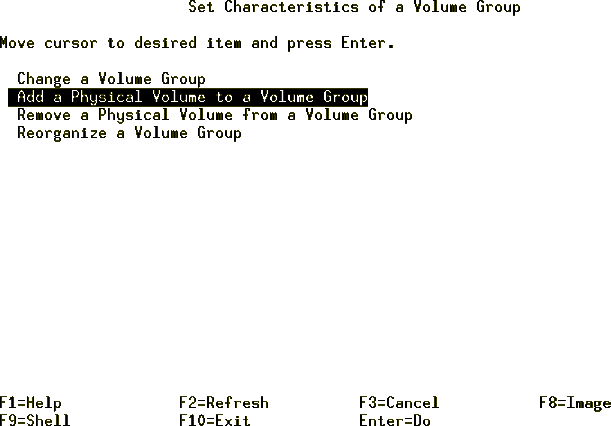
Figure 58: Set Characteristics of a Volume Group Menu
From the Add a Physical Volume to a Volume Group menu, insert the Volume
Group name and the Physical Volume names as displayed in
Figure 59.
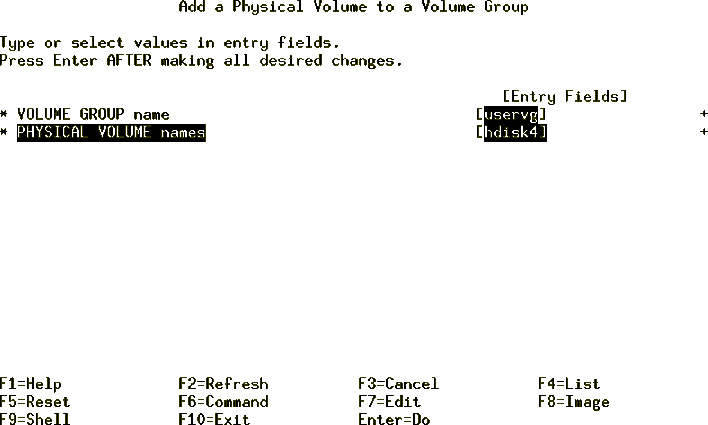
Figure 59: Add a Physical Volume to a Volume Group Menu
Once the Volume Group and Physical Volume information has been entered, the
system will display a confirmation message as displayed in
Figure 60.
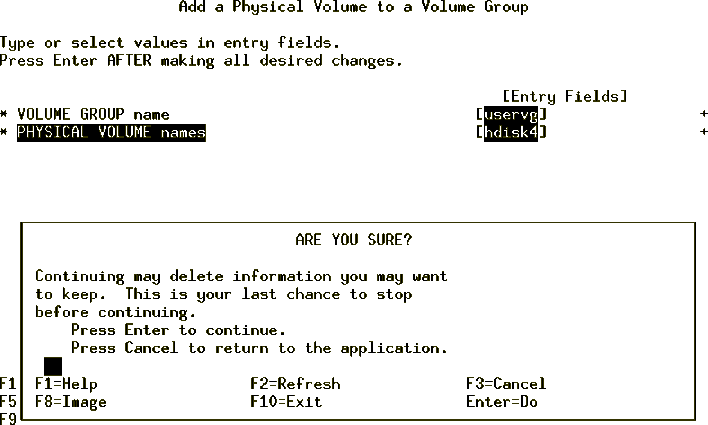
Figure 60: Add a Physical Volume to a Volume Group Confirmation
Display
Figure 61 shows the screen for the failed operation.
The reason for the failure is that the disk is defined but not available.
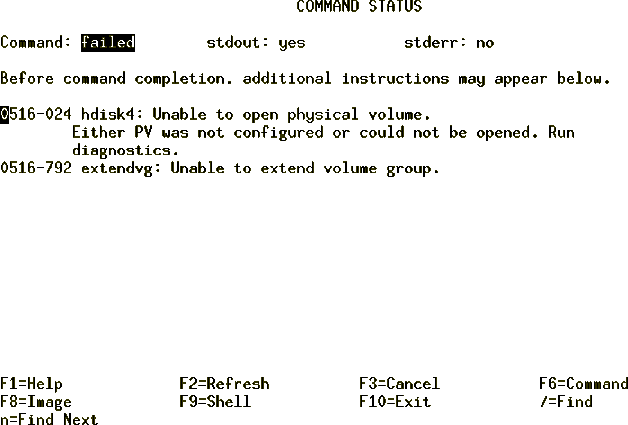
Figure 61: Command Status for the Add Physical Volume Option
Press F10 to exit SMIT and then type the following:
# mkdev -l 'hdisk4'
hdisk4 Available
The device hdisk4 is now available for the system to create a volume group on.
Go back into the SMIT Volume Group Menu and enter:
smitty vg
Select the Set Characteristics of a Volume Group as displayed in Figure 57.
Select the Add a Physical Volume to a Volume Group as displayed in Figure 58.
Enter the Volume Group name and the Physical Volume names as displayed in Figure 59. At the confirmation window press Enter to continue, as displayed in Figure 60.
Once the process is complete, the Command Status screen will display
OK for the successful completion of the command as shown in
Figure 62.
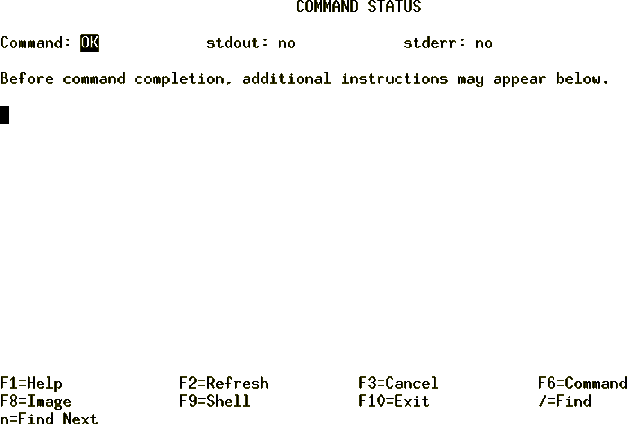
Figure 62: Successful Completion of Physical Volume Addition to Volume
Group
To check the volume group named uservg, enter:
# lsvg uservg
VOLUME GROUP:   uservg          VG IDENTIFIER:  000919742f85e776
VG STATE:       active          PP SIZE:       8 megabyte(s)
VG PERMISSION:   read/write       TOTAL PPs:    1074 (8592 megabytes)
MAX LVs:        256             FREE PPs:     873 (6984 megabytes
LLVs:           2               USED PPs:      201 (1608 megabytes)
OPEN LVs:       2               QUORUM:         2
TOTAL PVs:      2               VG DESCRIPTORS: 3
STALE PVs:      2               STALE PPs:      0
ACTIVE PVs:     2               AUTO ON:        yes
MAX PPs per PV: 1016            MAX PVs:        32