


 3.1.0.1 Order of
/etc/inittab Entries


 3.1.0.1 Order of
/etc/inittab Entries
Generally, if you encounter a problem in the booting process, you receive a three-digit LED error code. In this section, several software problems are discussed along with their possible solutions.
You can change the way your system looks up devices to find its boot code. The bootlist command displays and alters the list of boot devices available to the system. The general syntax of the command is as follows:
bootlist [ { -m Mode } [ -r ] [ -o ] [ [ -i ] | [ [ -f File ] [ Device [ Attr=Value ... ] ... ] ] ]
The most common flags used with bootlist command are given in
Table 1.
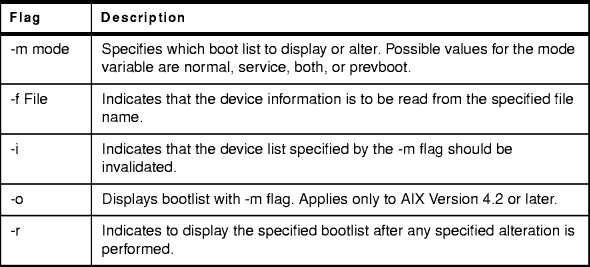
Table 1: bootlist Command Flags
The bootlist command allows the user to display and alter the list of possible boot devices from which the system may be booted. When the system is booted, it will scan the devices in the list and attempt to boot from the first device it finds containing a boot image. This command supports the updating of the following:
Support of these boot lists varies from platform to platform, and some platforms do not have boot lists. When searching for a boot device, the system selects the first device in the list and determines if it is bootable, if no boot file system is detected on the first device, the system moves on to the next device in the list. As a result, the ordering of devices in the device list is extremely important.
In order to display a boot list (Version 4.2 or later) use the command:
# bootlist -m normal -o
fd0
cd0
hdisk0
If you want to make changes to your normal boot list use the command:
bootlist -m normal fd0 hdisk0 cd0
This will change the normal bootlist to indicate that when the system is booted, it will first attempt to boot from the floppy disk, if it cannot find a boot image in fd0, it will then look for hdisk0 to find the boot code, then it will search the CD-ROM. Otherwise, it will give an LED code and wait for user intervention.
If you are unable to boot your system, the first step is to access the system and see what is the probable cause of the failure. This procedure enables you to get a system prompt so that you may attempt to recover data from the system or perform corrective action that will enable the system to boot from the hard disk.
In order to access the system:
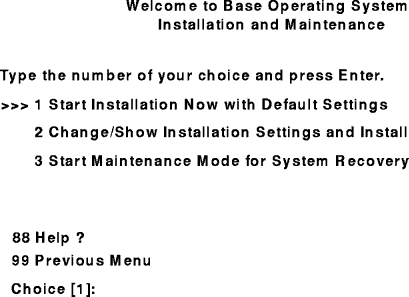
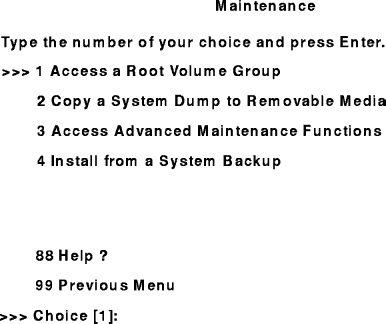
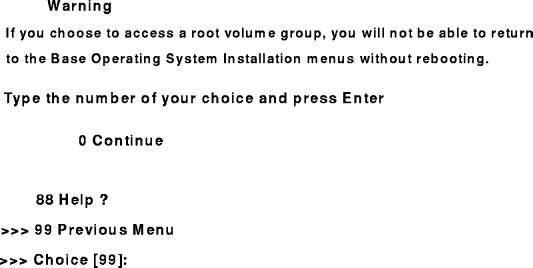
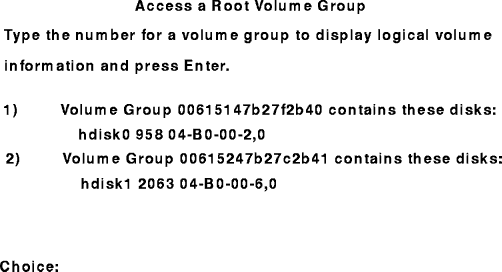
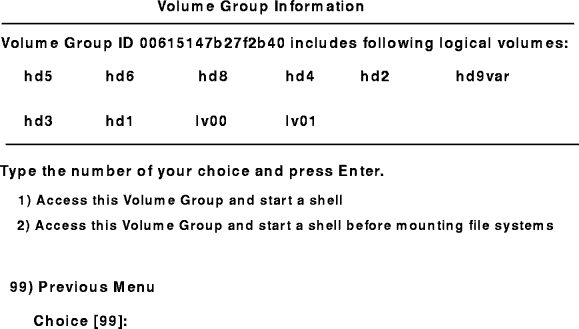
After either choice 1 or 2 is selected and processed, a shell and system prompt are displayed.
The most common boot problems and how to get around to
getting your system up and running again are given in
Table 2.
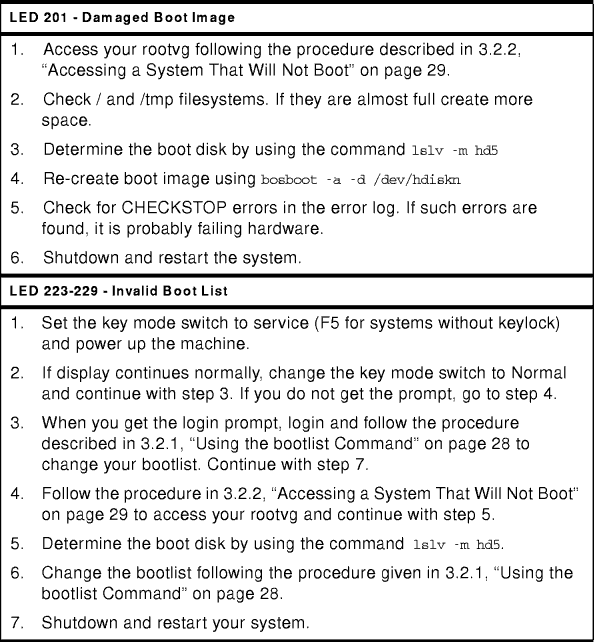
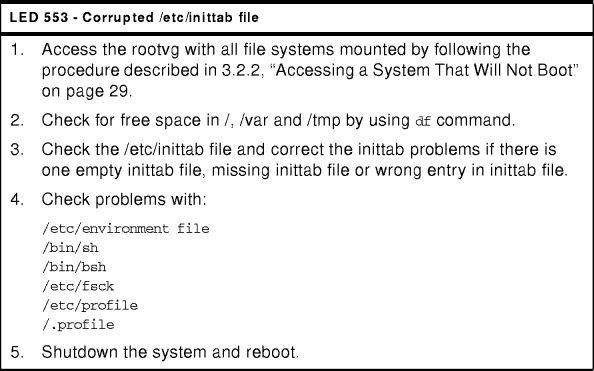
Table 2: Common Startup LEDs and Solutions
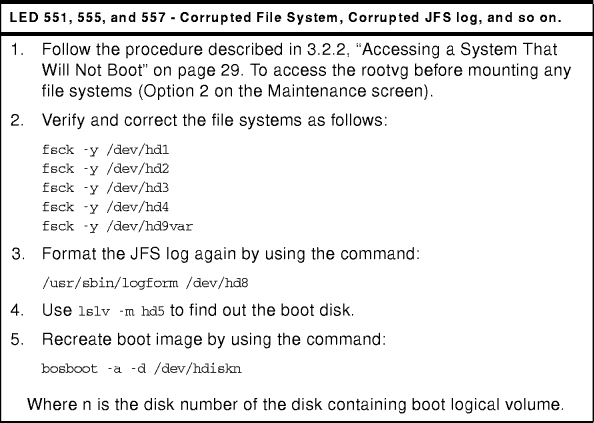
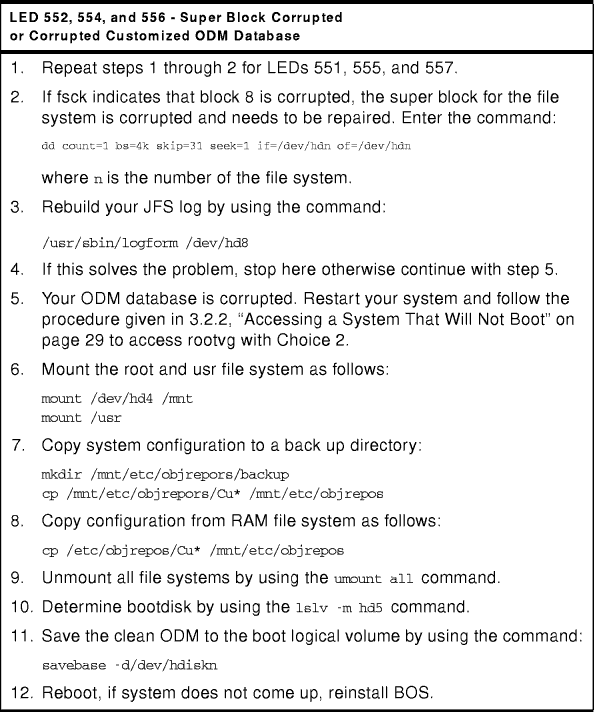
The following is an example of the lslv -m hd5 command used when locating the boot device in single user mode.
# lslv -m hd5
hd5:N/A
LP    PP1  PV1               PP2  PV2               PP3  PV3
0001  0001 hdisk0
#